I've had my Orion XT8 Classic Dobsonian Telescope for years and I love it. Last year at the Golden State Star Party we were "treated" to a thunderstorm the first night. I managed to stay pretty dry, but the base of my telescope got wet. Particle Board does not like to get wet.
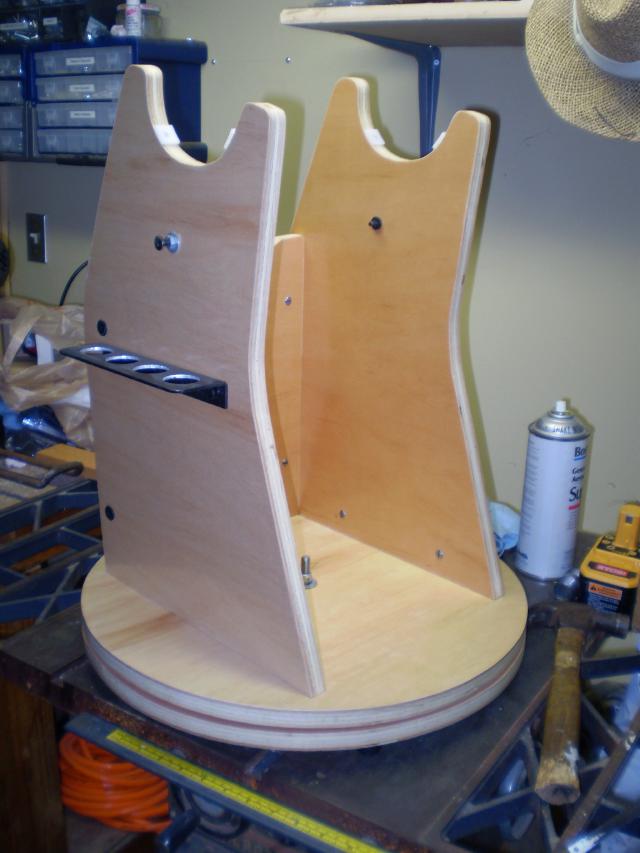
About a week later, it was starting to come apart. Luckily, I had a half sheet of 3/4" hardwood plywood left over from a kitchen remodel we did a couple of years ago. I took the original base apart and used the pieces as templates to cut new ones from the plywood. I reused as much of the original hardware as possible. I changed the connections between the pieces to some steel knock-down furniture fasteners. These are the kind where the screw that holds two boards together threads into the side a special pin that goes in a second hole drilled at right angles to the screw hole. They work really well and don't rely on screw threads biting into the edge of the plywood. Here's a picture of the complete base:
One problem I had was that the azimuth movement was sticky. It was just teflon pads riding on the multiple coats of polyurethane. The original was high pressure laminate on the friction surface. Telescope Builder folklore held that "Ebony Star" laminate in combination with the teflon pads gave the best results. Luckily, Scope Stuff sells pre-cut rings of the stuff complete with a set of pads. The prices look a little high at first, but they do include shipping, which can be expensive on an awkward part like this.
Laminate is generally installed with contact cement. My quandary was how to apply the cement to the base without making a mess. Here's how I did it.
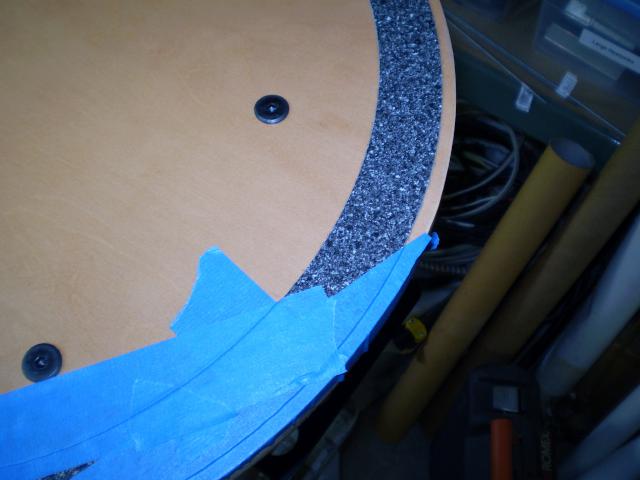
First, I centered the ring on the bottom of the rocker box with a couple of pieces of masking tape. Then, I started covering the laminate with tape, making sure to leave plenty of tape off the sides, and not worrying about completely covering the laminate itself.
When I had it all taped, I made a registration mark on the tape and then took an X-Acto knife to carefully cut around both edges of the laminate leaving a perfectly masked ring.

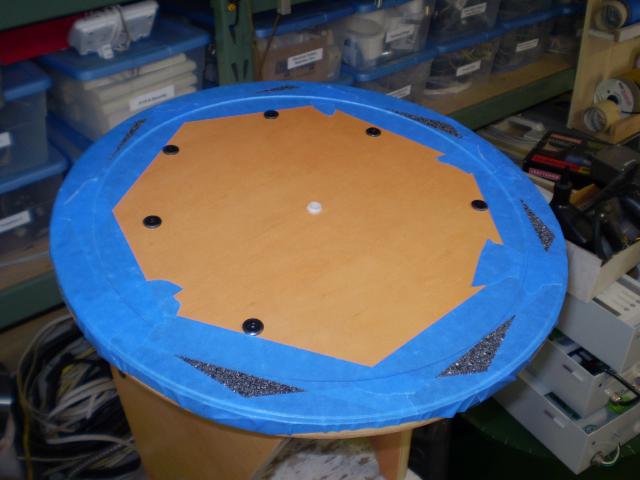
The contact cement goes on with a little brush in the bottle, so I didn't need to mask any more like I would with a spray adhesive. I put two coats on the base because of the shiny surface, and one coat on the back side of the laminate. When they were ready to go (Read the instructions) I put a bunch of cable ties laying flat across the glued area on the base to keep the ring from sticking all at once. When I had the ring lined up nicely, I pulled the cable ties out one-by-one and pressed the ring into place.
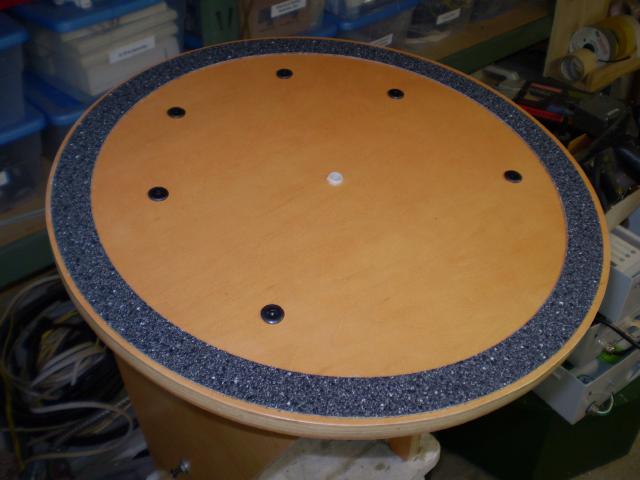
I also replaced the original teflon pads on the ground board with the new ones that came with the laminate ring. Now my telescope swings around nicely. Just the right combination of drag and ease of movement.
I'm planning to give it a really good workout this coming weekend (24-Apr-2010) for Astronomy Day at the Robert Ferguson Observatory.
Clear Dark Skies to All!
Keith
[ 3 comments ] ( 146 views ) [ 0 trackbacks ] permalink About a week later, it was starting to come apart. Luckily, I had a half sheet of 3/4" hardwood plywood left over from a kitchen remodel we did a couple of years ago. I took the original base apart and used the pieces as templates to cut new ones from the plywood. I reused as much of the original hardware as possible. I changed the connections between the pieces to some steel knock-down furniture fasteners. These are the kind where the screw that holds two boards together threads into the side a special pin that goes in a second hole drilled at right angles to the screw hole. They work really well and don't rely on screw threads biting into the edge of the plywood. Here's a picture of the complete base:
One problem I had was that the azimuth movement was sticky. It was just teflon pads riding on the multiple coats of polyurethane. The original was high pressure laminate on the friction surface. Telescope Builder folklore held that "Ebony Star" laminate in combination with the teflon pads gave the best results. Luckily, Scope Stuff sells pre-cut rings of the stuff complete with a set of pads. The prices look a little high at first, but they do include shipping, which can be expensive on an awkward part like this.
Laminate is generally installed with contact cement. My quandary was how to apply the cement to the base without making a mess. Here's how I did it.
First, I centered the ring on the bottom of the rocker box with a couple of pieces of masking tape. Then, I started covering the laminate with tape, making sure to leave plenty of tape off the sides, and not worrying about completely covering the laminate itself.
When I had it all taped, I made a registration mark on the tape and then took an X-Acto knife to carefully cut around both edges of the laminate leaving a perfectly masked ring.
The contact cement goes on with a little brush in the bottle, so I didn't need to mask any more like I would with a spray adhesive. I put two coats on the base because of the shiny surface, and one coat on the back side of the laminate. When they were ready to go (Read the instructions) I put a bunch of cable ties laying flat across the glued area on the base to keep the ring from sticking all at once. When I had the ring lined up nicely, I pulled the cable ties out one-by-one and pressed the ring into place.
I also replaced the original teflon pads on the ground board with the new ones that came with the laminate ring. Now my telescope swings around nicely. Just the right combination of drag and ease of movement.
I'm planning to give it a really good workout this coming weekend (24-Apr-2010) for Astronomy Day at the Robert Ferguson Observatory.
Clear Dark Skies to All!
Keith

 ( 3 / 2452 )
 Calendar


